How to Add Push Messages to a Web Site
Push notifications are a great way to make instant contact with your site visitors in common browsers, even if the site is not open in the browser (works great in Chrome)
When you send a push notification, all your Android, iOS, and web push users will get your notification.
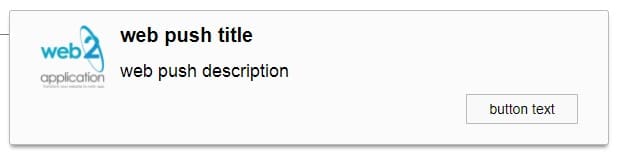
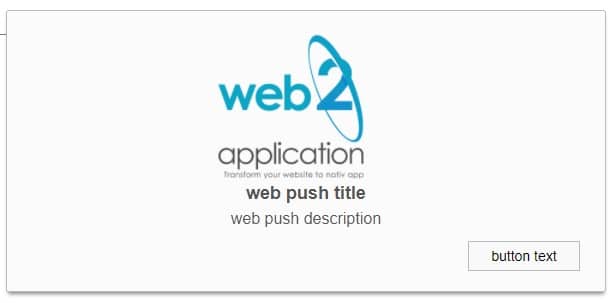
sample of web push:

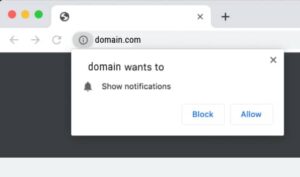
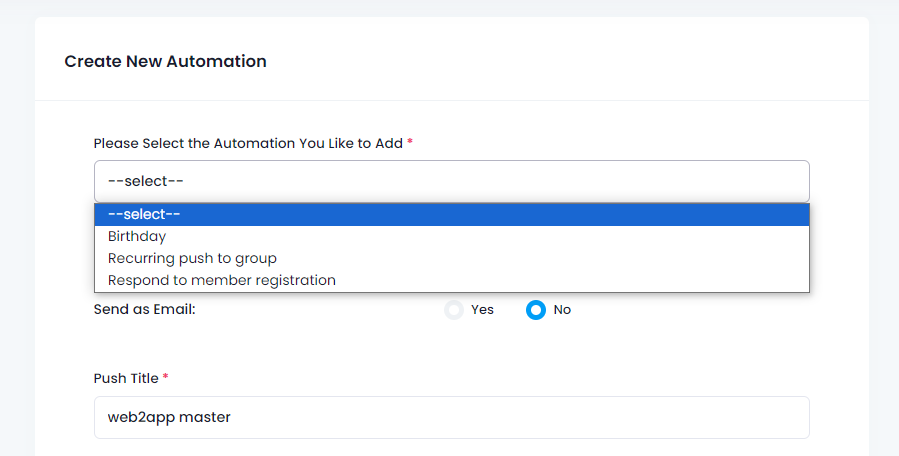
You can also select through the system 3 kinds of prompts to your website users :
It’s important to make sure that the site runs securely on the HTTPS protocol. If not the push messages will not work! (Google policy)
IF YOU HAVE A WORDPRESS WEBSITE, YOU JUST NEED TO SET THE WEB PUSH IN OUR SYSTEM AND INSTALL THE WEB2APPLICATION PLUGIN ON YOUR WEBSITE AND YOUR WEB PUSH NOTIFICATION WILL WORK
Below is an explanation of how to set up Push messages on your site using web2application.com
Step 1:
Enter your FIREBASE account. If you do not have an account for your application, you must open an account with your Gmail. (FIREBASE belongs to Google.)
Address: https://console.firebase.google.com
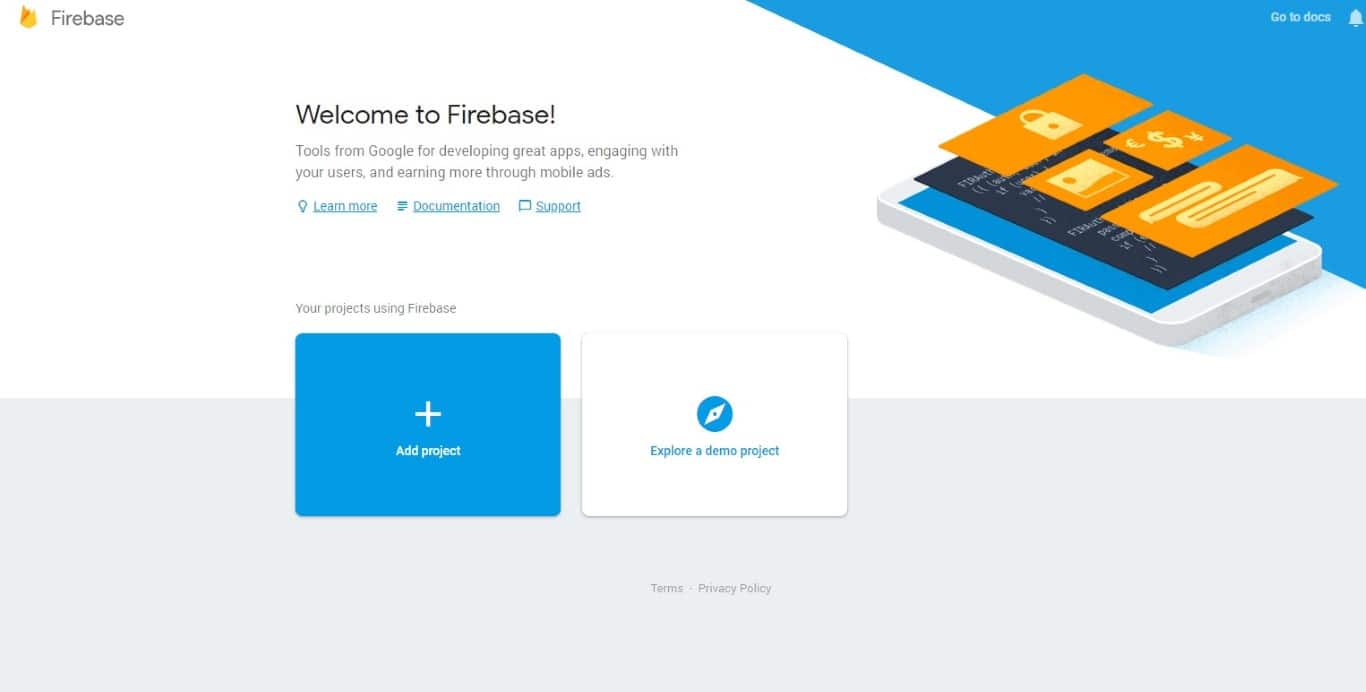
Click Add Project and fill in the details.
Step 2:
Right now after you have an account, click Add app

And select a web app
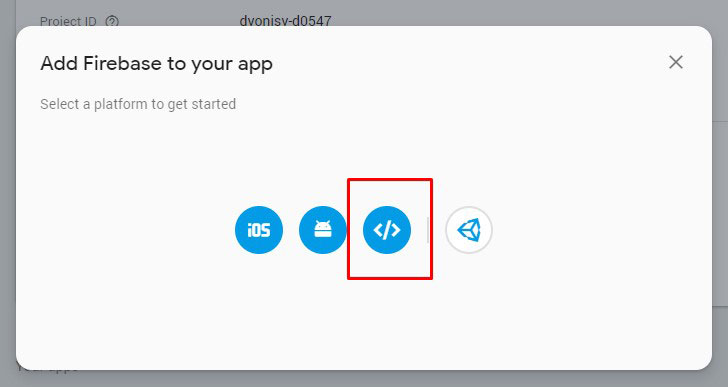
Step 3:
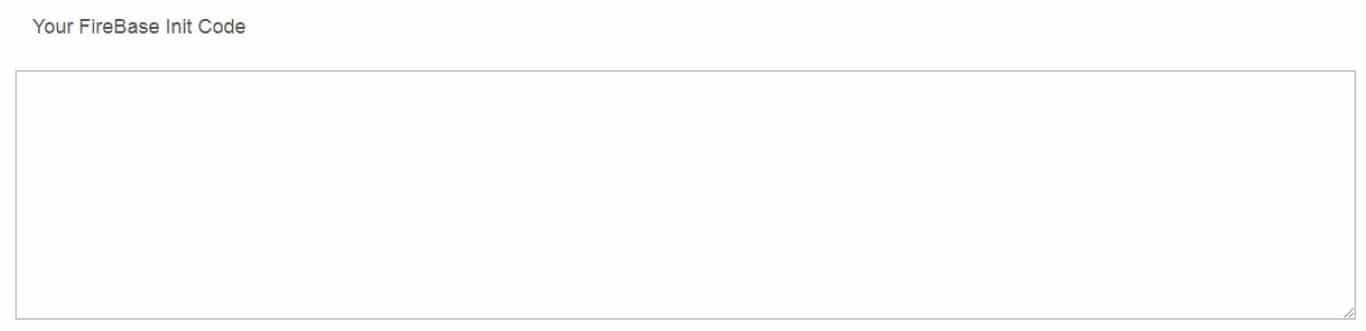
After you click, a window will open with a code that needs to be copied to your system at web2application.com
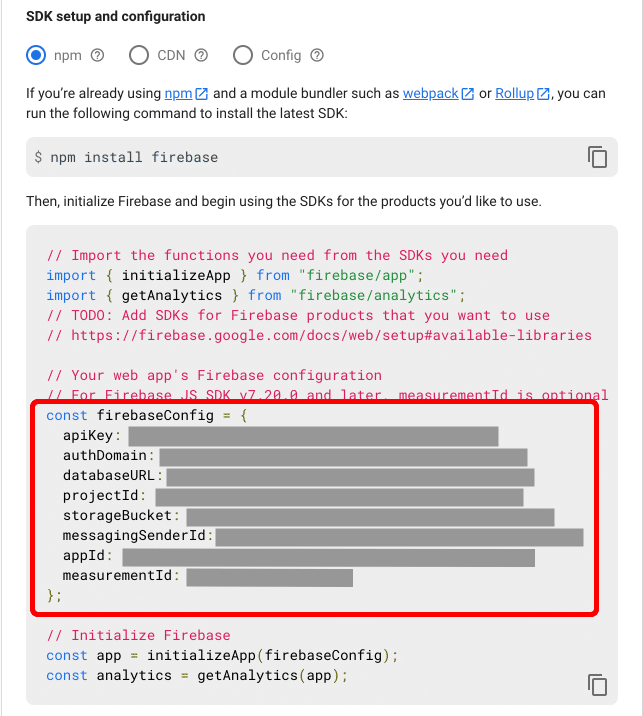
Important – Copy only the lines marked with the code and paste them into the correct field in your management interface.
Step 4:
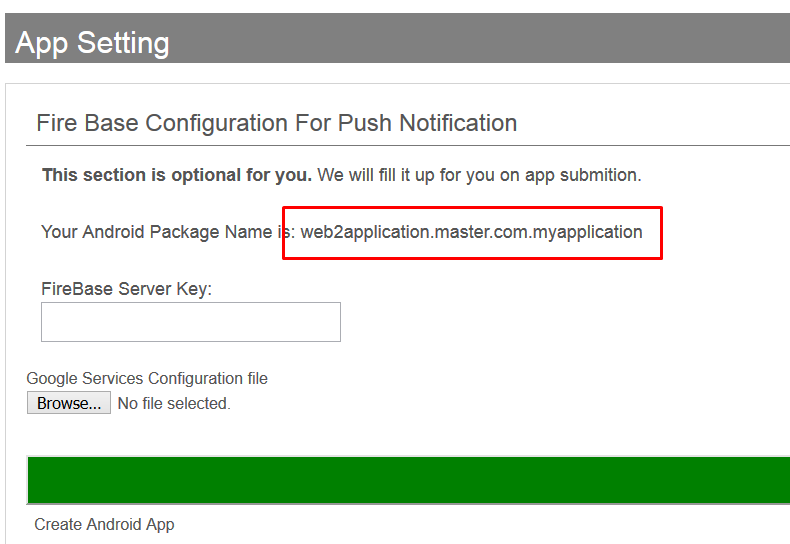
Access the app’s settings by clicking the gear on the menu and then the Project setting

Step 5:
Navigate to the Cloud messaging area and copy the Legacy server key.
Important – note that there are no spaces on the right or left side
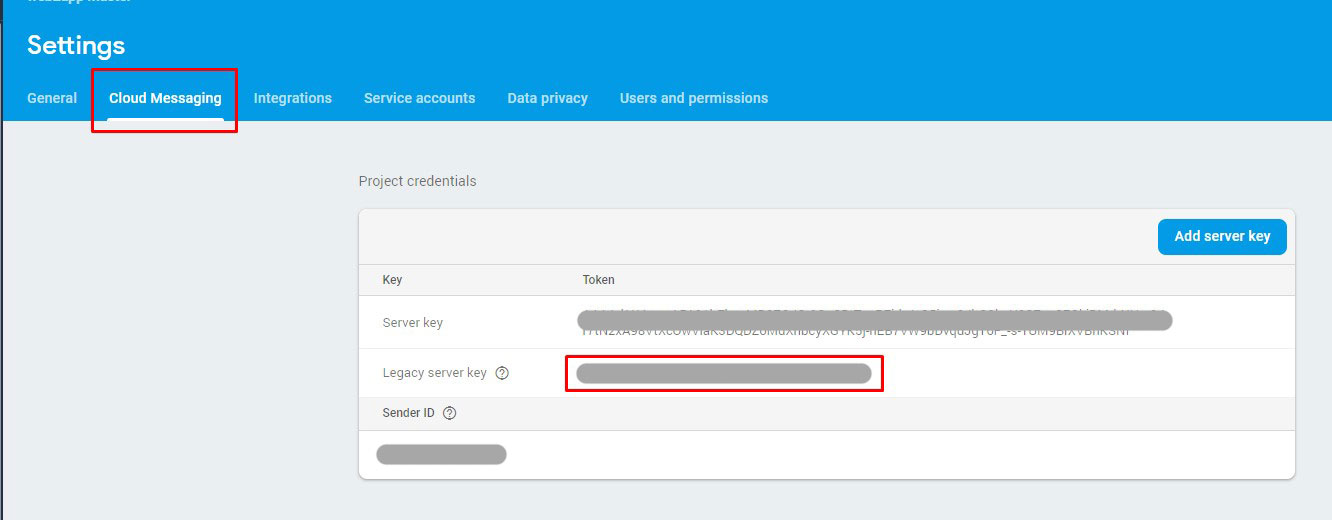
Then copy the code to the appropriate field in your admin interface

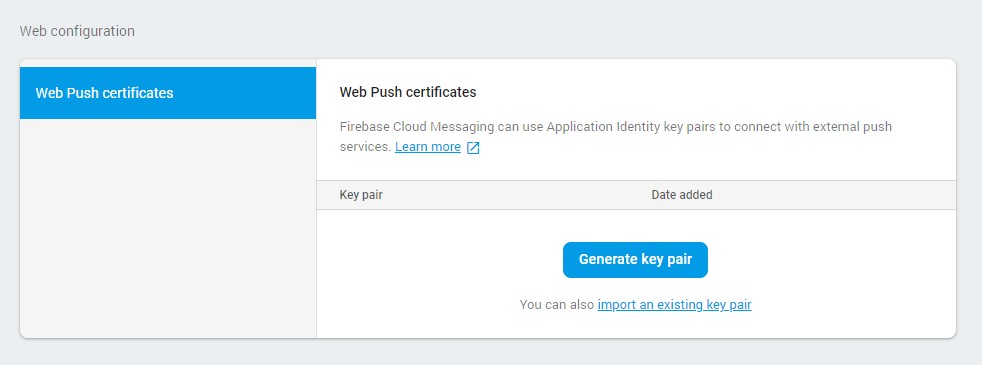
Step 6:
At this stage, you need to produce a certificate for your site.
Scroll to the bottom of the page and press the Generate key pair
After you click, you will receive your certificate code:
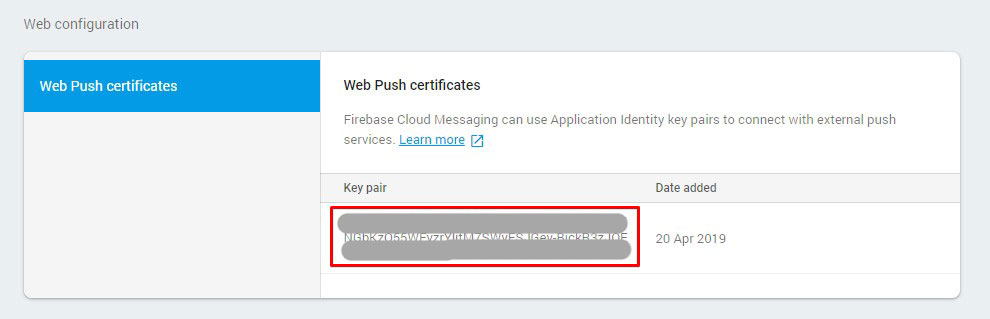
Copy it to the appropriate field in your management interface

And then click Save
• Please note that for security reasons, if the process takes a long time, you will have to re-enter the system and enter the data again.
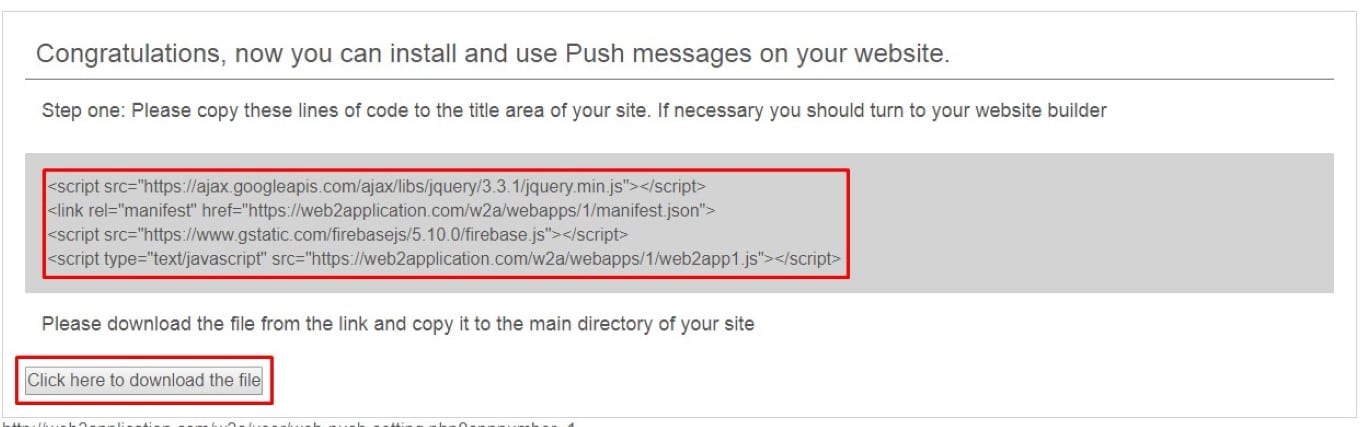
Step 7:
Once you have stored the data and saved it, you will be presented with the codes to be embedded in the HEADER of your site and a file to download.
the file needs to be uploaded to your site’s main ROOT folder. (The main folder of the site on the server)
Please Note: if you have a WordPress website, Our plug installation will install the web push codes and file automatically !
But, if you are using wp-rocket minify, it should break Firebase JS code. Please exclude the Firebase code from the modification
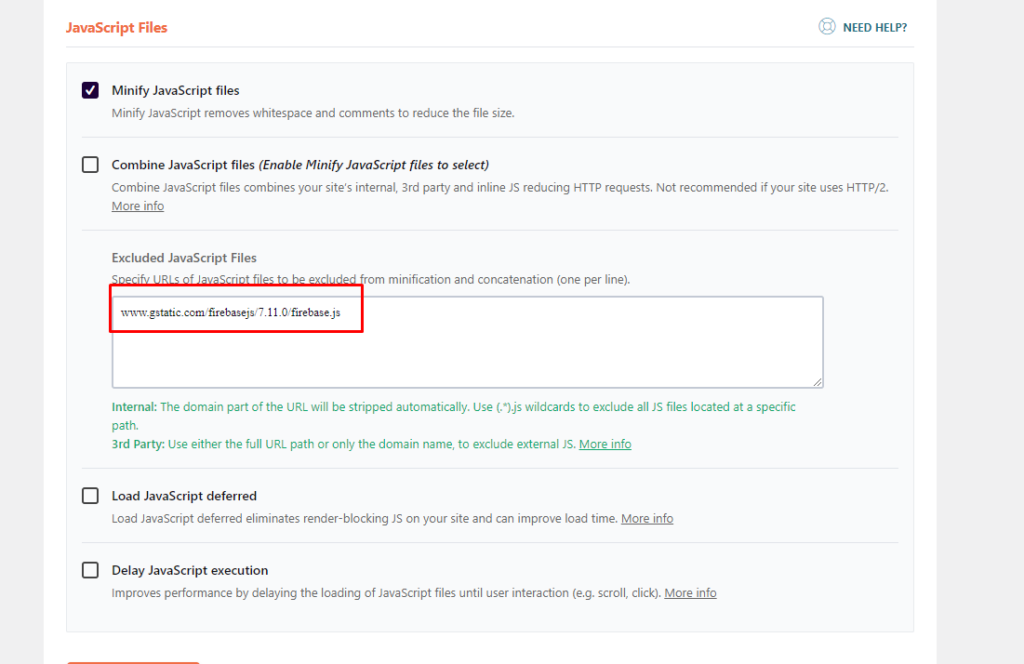 www.gstatic.com/firebasejs/7.11.0/firebase.js
If you are using litespeed cache please enter “pages optimizing” > “tuning settings” tab and find the box of “js excludes”
 and add those 2 lines:
www.gstatic.com/firebasejs/7.11.0/firebase.js
firebase.js
Step 8:
Check and send a push
Once you’ve set everything up, it’s time to check whether your browser’s messages are working.
Browse to your site and you should be notified that your site wants to be approved for sending messages
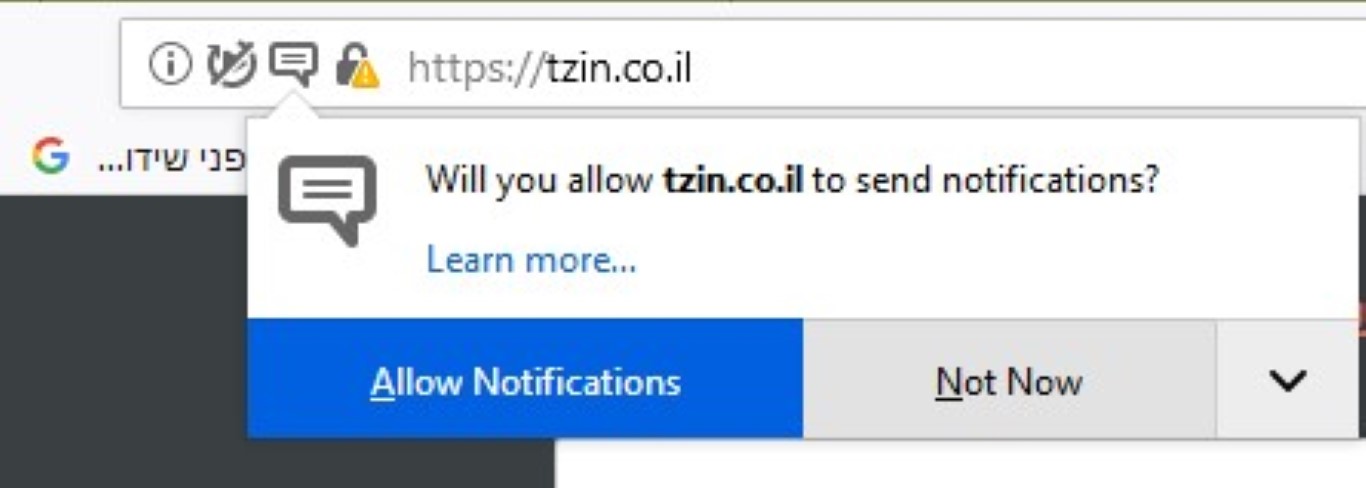
Please confirm the request
Sending Test Push:
Enter the management interface and navigate to the push-sending area
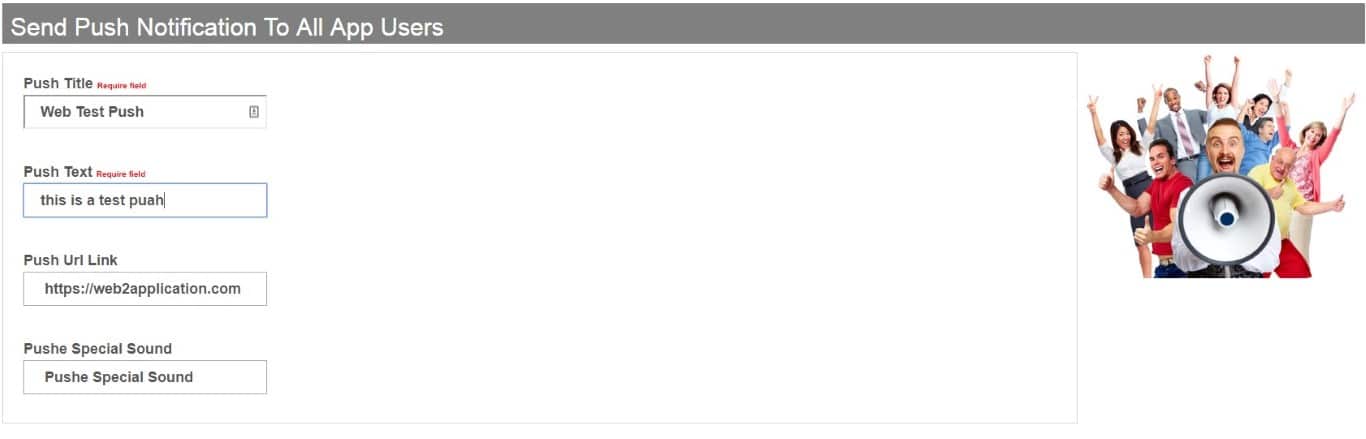
• Please note that sending the push will reach all your users on the site, in the Android app and in your IOS application, if any.
How to Add Web Push Notifications to Your Website with Web2Application
Web push notifications are an effective way to engage your website visitors instantly, even when they are not actively browsing your site. Using Web2Application, you can easily add web push notifications to your website and reach users on Android, iOS, and desktop browsers like Chrome.
Follow these simple steps to set up web push notifications:
- Create a Firebase Account: Go to Firebase Console and sign in with your Google account. Click Add Project and fill in the required details.
- Add a Web App in Firebase: In your Firebase project, click Add app and select the web app option. Copy the generated code snippets carefully.
- Enter Firebase Codes in Web2Application: Paste the copied Firebase code into the appropriate fields in your Web2Application dashboard under the Push Settings section.
- Retrieve Cloud Messaging Keys: In Firebase, access Project Settings > Cloud Messaging and copy the Legacy Server Key. Paste this key into Web2Application.
- Generate Security Certificate: Scroll to the bottom of the Firebase Cloud Messaging page and click Generate key pair. Copy the certificate code and save it in Web2Application.
- Embed Codes and Upload Files: Web2Application will provide you with header codes to embed in your website and a file to upload to your site’s root folder.
- WordPress Integration: If you use WordPress, simply install the Web2Application plugin. It automatically handles the web push code installation and file uploads for you. Remember to exclude Firebase JS from minification if using optimization plugins like WP Rocket.
Important: Your website must use HTTPS to enable push notifications, as required by Google policies.
By following these steps with Web2Application, you can easily add web push notifications to your site and keep your users engaged.
Why Choose Web2Application for Web Push Notifications?
- Seamless Firebase integration through the dashboard
- Automatic WordPress plugin support for easy setup
- Support for Android, iOS, and web browsers
- Secure and compliant with Google’s HTTPS requirement
- Access to Premium features including push notifications with a 14-day free trial
Ready to engage your visitors with web push notifications? Create Your App Free today at Web2Application. Generate a test APK and explore Premium features with a 14-day trial.
Related Resources
- Complete Push Notifications Setup Guide
- WordPress Plugin Integration for Web2Application
- How to Test Your App with APK
Frequently Asked Questions
What are web push notifications?
Web push notifications are messages sent to users' browsers to engage them with your website content even when they are not actively visiting your site.
Do I need HTTPS to enable web push notifications?
Yes, HTTPS is required by Google policies to ensure secure delivery of push notifications.
Can I add web push notifications if I have a WordPress website?
Yes, Web2Application offers a WordPress plugin that automatically installs and configures web push notifications for your site.
Is Firebase required to set up web push notifications?
Yes, Firebase is used to manage and send push notifications. Web2Application integrates with Firebase to simplify the setup.
Can I try push notifications before upgrading to Premium?
Yes, when you create your app free with Web2Application, you get a 14-day trial to explore Premium features including push notifications.
Ready to turn your website into an app?
Create your Android and iOS app without coding. Start free, generate a test APK, and explore Premium features with a 14-day trial.

 By
By 

